

User Management
The User Management section lets administrators view all users, invite new ones, manage individual profiles, and track registration codes. Access it from the sidebar by selecting User Management > Users.
Seat usage
Section titled “Seat usage”At the top of the page, two banners show how many practitioner and client seats your workspace uses out of the limit on your plan, and how many remain. When a limit is reached, the banner says so and new invitations that need a seat are refused until a seat frees up. Plans without a seat limit don’t show these banners.
Inviting users
Section titled “Inviting users”Single invite
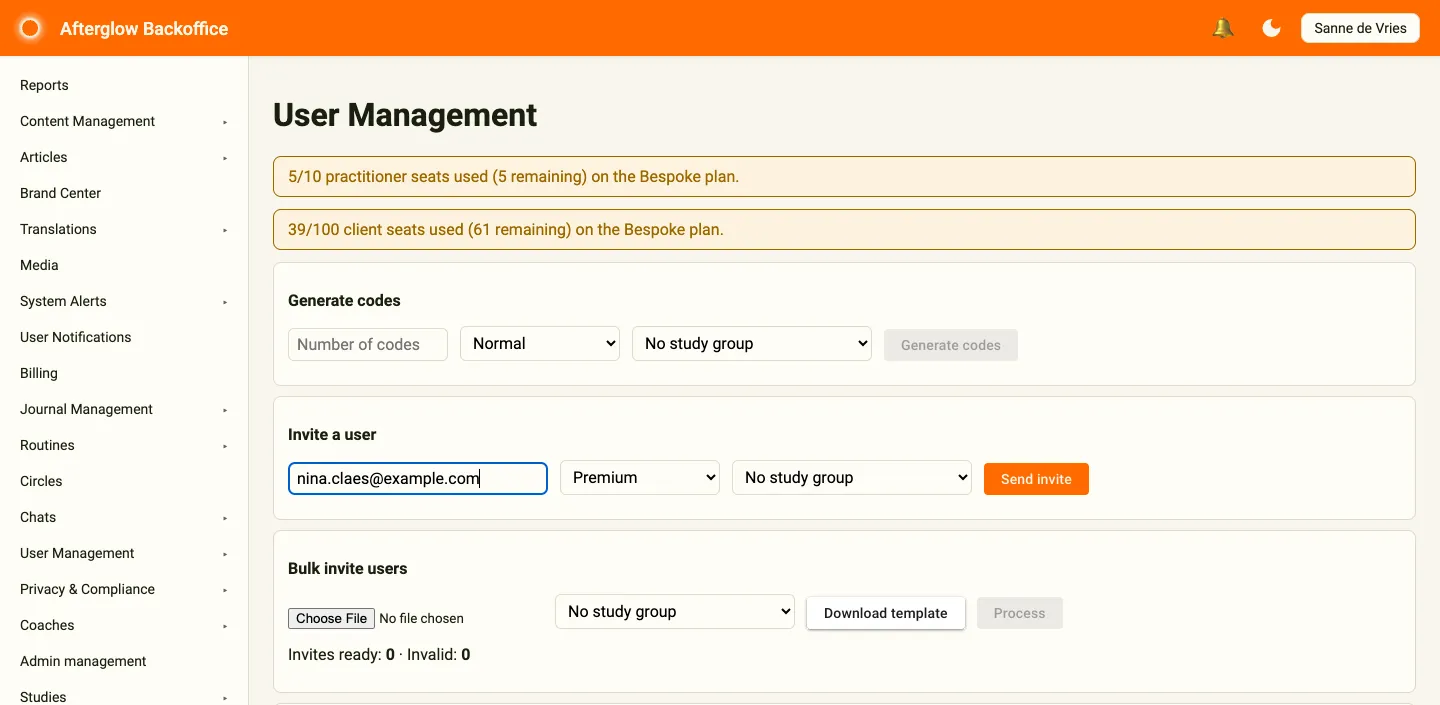
Section titled “Single invite”The Invite a user form lets you send an invitation to a single email address. Enter the email, select a code type (Normal, Premium, or Upgrade), and click Send invite. The user receives an email with instructions to register.
Bulk invite
Section titled “Bulk invite”Below the single invite form, the Bulk invite users section supports CSV-based bulk invitations. The workflow is:
- Click Download template to get a CSV template with
EmailandCodeTypecolumns. - Fill in the template with user details.
- Click Choose File and select your CSV file.
- Review the count of valid invites (Invites ready) and invalid rows (Invalid). If there are invalid rows, click Download invalid rows to get a report for correction.
- Click Process to send all invitations.
Generating codes (Bespoke tier)
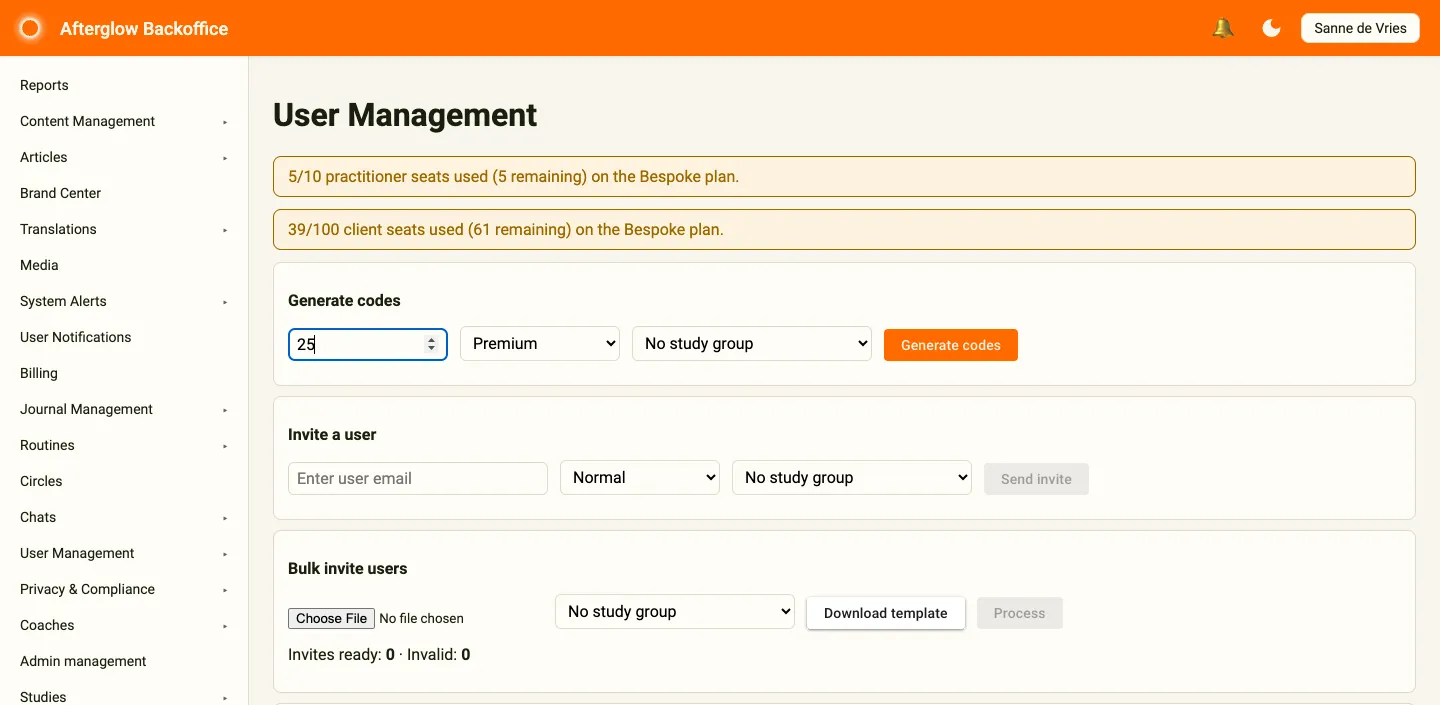
Section titled “Generating codes (Bespoke tier)”On the Bespoke tier, the Generate codes section lets administrators create registration codes in bulk. Enter the Number of codes, choose the code type (Normal, Premium, or Upgrade), then click Generate codes. The generated codes are downloaded as a CSV file.
Assigning a study group
Section titled “Assigning a study group”When the Studies feature is enabled for your workspace, you can optionally enroll the people you invite into a research study group — an arm of a study. This lets you bring participants into a study at the moment they receive their invitation.
This option is available to administrators. The study group selector (which shows No study group by default) only appears when Studies is enabled for your workspace; if you don’t see it, Studies is turned off.
The selector appears in three places:
- The single Invite a user form.
- The Bulk invite users section.
- The Generate codes section.
The study group dropdown only lists groups belonging to active studies. Each option is labeled Study name — Group name so you can tell groups apart. The default is No study group, which creates ordinary codes with no study link.
Choosing a group stamps that study and group onto every code created in that action. For bulk invites and bulk code generation, the selected group applies to all codes in that batch. When an invited person registers with one of these codes, they are automatically enrolled into that study group.
User list
Section titled “User list”The Users table displays all registered users, newest first, with the following columns:
- Email — Click to open the user’s profile.
- Premium — Whether the user has premium status.
- Code used — The registration code the user redeemed.
- Timezone — The user’s configured timezone.
- Register date — When the user registered.
Use the Search by email or code box to find specific users. Click Download CSV to export all users that match your search. Use the page size selector and the Previous / Next buttons to move through the list.
User profile
Section titled “User profile”Clicking a user’s email in the user list opens their profile page, which contains a profile card, an emotion chart, and a set of tabs. Click Back to return to the user list.
Profile card
Section titled “Profile card”The profile card shows the user’s name, email, profile picture, a Premium or Free chip (plus an Inactive chip for deactivated users), registration date, last login date, age, sex, and the code they used. From this card you can:
- Upgrade to Premium — Shown for free users. Opens a dialog to assign an available Premium or Upgrade code to the user.
- Deactivate user / Reactivate user — Changes the user’s active status after you confirm. Deactivated users cannot access the application. Reactivating a user needs a free client seat.
Authorization tab
Section titled “Authorization tab”The Authorization tab provides a Change password form (new password entered twice) and a Change email form for the user.
Activity tab
Section titled “Activity tab”The Activity tab shows the user’s completed lessons in a table with columns for completion date, lesson, module, number of completions, and latest completion date.
Survey analysis tab
Section titled “Survey analysis tab”The Survey analysis tab visualizes the user’s survey responses. Select a completed survey from the dropdown to see a chart for each answer group. Horizontal bar charts show answer groups with one or two answers, and line charts track responses over time.
Manage content tab
Section titled “Manage content tab”The Manage content tab lists all lessons that have manual availability rules configured, with their category and module. Administrators can switch access per lesson on or off for the user (Activated), set an optional Expiry date, and click Save to apply all changes at once.
Privacy tab
Section titled “Privacy tab”The Privacy tab is only visible to users with the Admin role. From here you can start a data export or a data erasure for this user, and see the history of their privacy requests. See Privacy & Compliance for how these requests work.
Emotion analysis graph
Section titled “Emotion analysis graph”Next to the profile card, an Emotional Analysis chart plots the user’s most recent journal emotion scores (joy, sadness, anger, fear, surprise, disgust) over time.
Codes table
Section titled “Codes table”Back on the main User Management page, the Codes table at the bottom lists all registration codes for the workspace. Each row shows the code, type, active and billed status, the email of the user who redeemed it (or Not redeemed / User deleted), the redeem date, and the creation date. Administrators can:
- Reactivate unused, inactive, unbilled codes.
- Delete unused, active, unbilled codes.
- Download CSV to export the codes list.
- Search by code or email using the Search by code or email box.
Related topics
Section titled “Related topics”- Roles and Permissions — How roles control access across the platform.
- Availability Rules — How content availability is determined.
- Studies — How research studies and study groups work.