

Media
The Media section is the central library for all files used across your platform — images, audio, video, and fonts. Every file you reference in modules, lessons, articles, or branding lives here.
Who has access?
Section titled “Who has access?”Media management is available to users with one of the following roles:
- Admin — Full access to upload, edit, and delete media.
- SuperUser — Full access to upload, edit, and delete media.
- Coach — Full access to upload, edit, and delete media, from the Content Management section of Practice (see Content).
The media library is shared across the platform — files you upload from the Backoffice are also available to coaches in Practice, and vice versa.
See User Roles for a complete role comparison.
Media library
Section titled “Media library”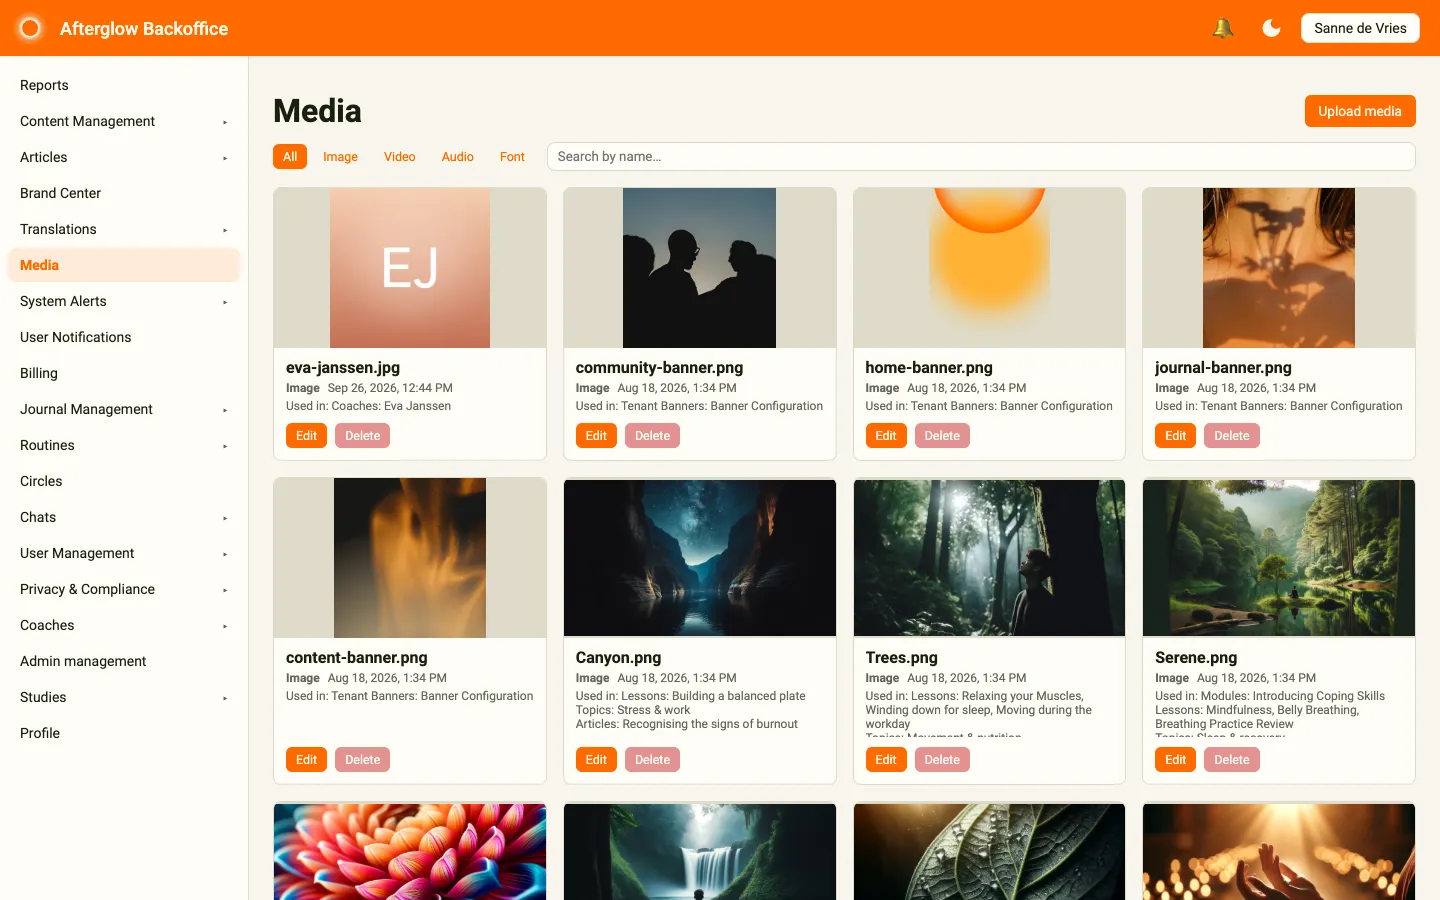
Click Media in the sidebar to open the library. The Upload media button sits at the top right, with the type filters and a search field above the file library.
Supported file types
Section titled “Supported file types”| Type | Accepted formats |
|---|---|
| Image | .jpg, .jpeg, .png, .gif, .bmp, .webp |
| Audio | .mp3, .wav, .ogg, .m4a |
| Video | .mp4, .avi, .mov, .mkv |
| Font | .ttf, .otf |
Each type has its own size limit:
| Type | Maximum file size |
|---|---|
| Image | 25 MB |
| Audio | 50 MB |
| Video | 100 MB |
| Font | 5 MB |
Uploading files
Section titled “Uploading files”- Click Upload media.
- Select one or more files on your computer. You can upload up to 50 files at once, within the size limits listed above.
- The upload starts straight away. Each file appears in a list above the library with its status: Uploading, then Processing, or an error message if the file could not be uploaded.
After uploading, the file is processed in the background. Its card shows Processing… until it is ready to use.
Browsing and filtering
Section titled “Browsing and filtering”The file library displays all media as cards in a grid layout. Each card shows:
- A preview of the file (thumbnail for images, playback controls for audio and video, font sample for fonts).
- The file name, type, and upload date.
- Usage information — which modules, lessons, articles, or other features reference this file.
- Edit and Delete buttons.
The newest files are shown first. Use the Search by name… field to find files by name, or the All, Image, Video, Audio, and Font filters to show one type of media. Page controls below the grid let you move between pages.
Editing media
Section titled “Editing media”Click a media card or its Edit button to open the detail page. The detail page shows:
- Full preview — A larger view of the file. Images display at full size. Audio and video include playback controls. Fonts show a character sample.
- Details — The file name (editable), type, processing status, and creation date.
- Usage — A list of every place the file is referenced, grouped by category (Modules, Lessons, Articles, Workspace Banners, Font Assignments, etc.). Each item links directly to where the file is used.
Renaming a file
Section titled “Renaming a file”- On the media detail page, click Rename next to the file name.
- Enter the new name.
- Click Save to confirm, or Cancel to discard the change.
The file is renamed everywhere it is used.
Transcripts
Section titled “Transcripts”For audio and video files, a Transcript section appears on the detail page. Transcripts are text files (.txt) that provide a written version of the media content.
- Upload — Click Upload transcript (.txt) and select a
.txtfile (max 10 MB). - Replace — Click Replace to swap the existing transcript for a new one.
- Delete — Click Delete to remove the transcript entirely.
Deleting media
Section titled “Deleting media”You can delete a media file only if it is not currently in use. If the file is referenced by any module, lesson, article, banner, font assignment, coach profile, notification, or translation override, the Delete button on its card is disabled. On the detail page, Delete media shows where the file is still used instead of deleting it.
To delete a file that is in use, first remove it from all places where it is used, then return to the media library or detail page and delete it. You are asked to confirm before a file is deleted.
Where media is used
Section titled “Where media is used”Media files can be referenced from many areas of the platform:
- Modules and Lessons — Cover images.
- Lesson Steps — Audio, video, and background images.
- Articles — Cover images and embedded media within article content.
- Topics — Cover images.
- Brand Center — Banners, fonts, and videos. See Brand Center for details.
- Coaches — Profile pictures.
- User Notifications — Attached media.
- Translations — Font overrides for translation styling.
The usage panel on each media detail page shows exactly where a file is referenced, with direct links to each item.
Related topics
Section titled “Related topics”- Content Management — Managing modules and lessons that reference media.
- Articles — Creating articles with cover images and embedded media.
- Brand Center — Configuring banners, fonts, and videos for your workspace.