

Reports
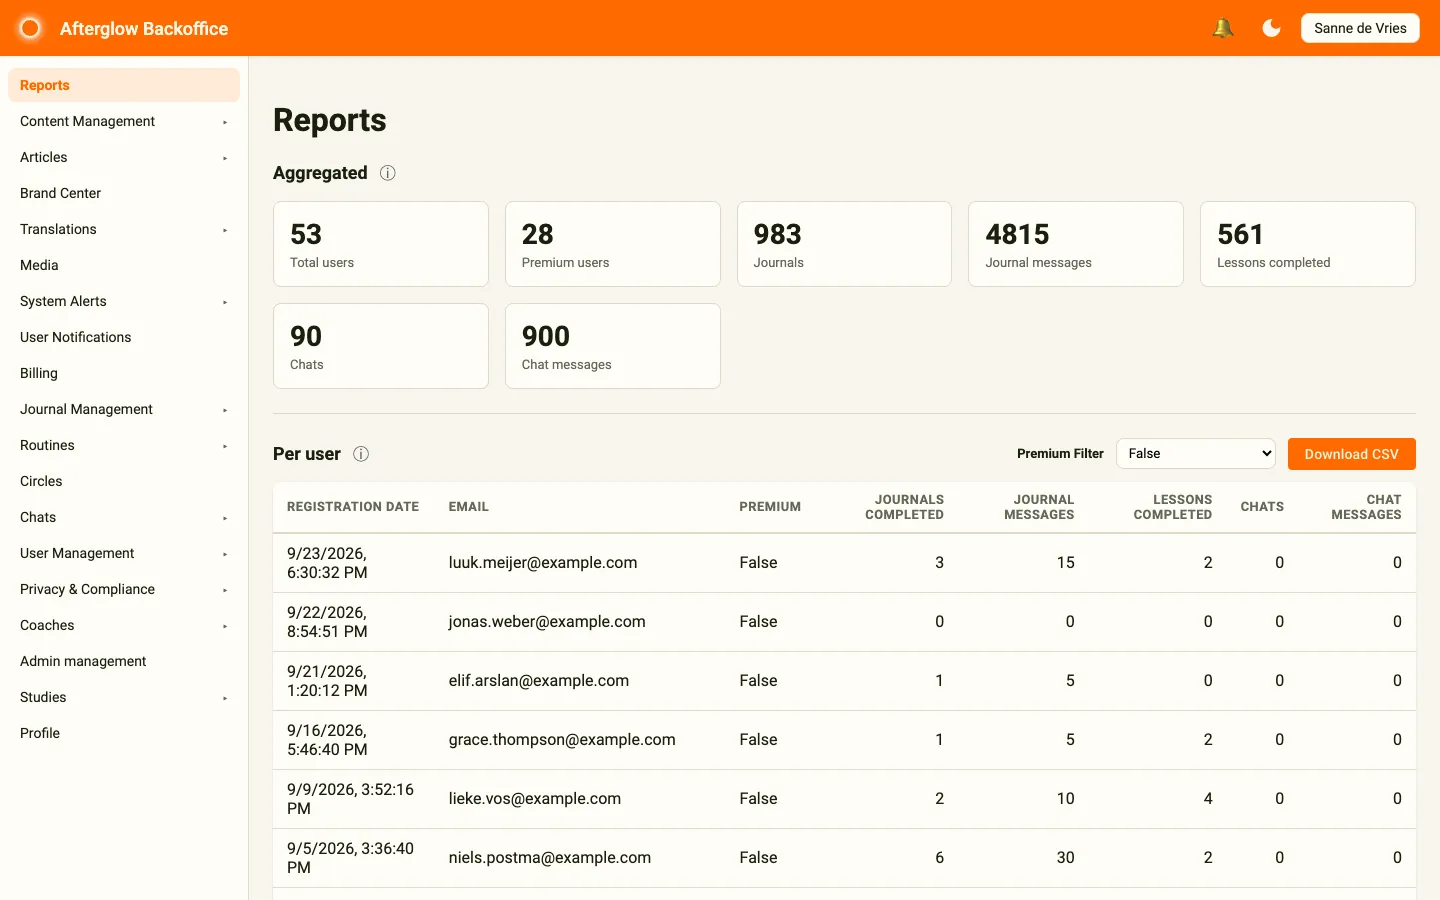
The Reports page is the default landing page of the Backoffice. It provides aggregated platform analytics, per-user engagement data, and survey result exports. Access it from the sidebar by selecting Reports.
Aggregated data
Section titled “Aggregated data”The top section displays high-level platform statistics in a set of summary cards:
- Total users — The total number of registered users in the workspace.
- Premium users — The number of users with premium status.
- Journals — The total number of completed journal sessions.
- Journal messages — The total number of messages exchanged in journal sessions.
- Lessons completed — The total number of lesson completions across all users.
- Chats — The total number of chat conversations.
- Chat messages — The total number of messages sent in chats.
These statistics include all users in your workspace. Click the info icon next to the Aggregated header for a short explanation.
Per-user data
Section titled “Per-user data”The Per user table breaks down engagement metrics for each individual user. It only includes users who have opted in to share their data with you, so its totals can differ from the aggregated numbers. Like the aggregated data, it is updated every hour. The table includes the following columns:
- Registration date — When the user registered.
- Email — The user’s email address.
- Premium — Whether the user has premium status.
- Journals completed — Number of completed journal sessions.
- Journal messages — Number of journal messages sent.
- Lessons completed — Number of lessons the user has completed.
- Chats — Number of chat conversations.
- Chat messages — Number of chat messages sent.
The newest users are listed first. Use the Premium Filter dropdown to filter the table by premium status (All, True, or False), and the page controls below the table to change the page size or move between pages.
Click Download CSV to export the per-user data, including additional fields such as age and sex, as a CSV file.
Survey data export
Section titled “Survey data export”The Export Survey section at the bottom of the page lets you export raw survey response data.
- Select a survey from the Surveys dropdown.
- Optionally set a Date range to limit the export to responses within a specific period.
- Click Download Results to generate and download a CSV file.
The exported CSV includes one row per survey submission, with the user’s email, each question as a column header, their answers, and the submission date.
Related topics
Section titled “Related topics”- User Management — Manage individual user accounts and profiles.
- Content Structure — How modules, lessons, and surveys are organized.