First steps: Admin
This guide walks you through your first session in the Afterglow Backoffice, from logging in to creating content and inviting users.
Step 1 — Log in
Section titled “Step 1 — Log in”- Open the Backoffice URL provided by your organization.
- Enter your email address and password.
- Click Login.
You land on the Reports dashboard, which is the default home page.
Step 2 — Explore the dashboard
Section titled “Step 2 — Explore the dashboard”The Reports page gives you an at-a-glance summary of platform activity. It displays aggregated metrics including:
- Total users and premium users — how many people are on the platform.
- Journals and journal messages — journaling engagement.
- Lessons completed — content consumption progress.
- Chats and chat messages — community messaging activity.
Below the aggregated cards you will find a user data table with per-user analytics and a survey data exporter.
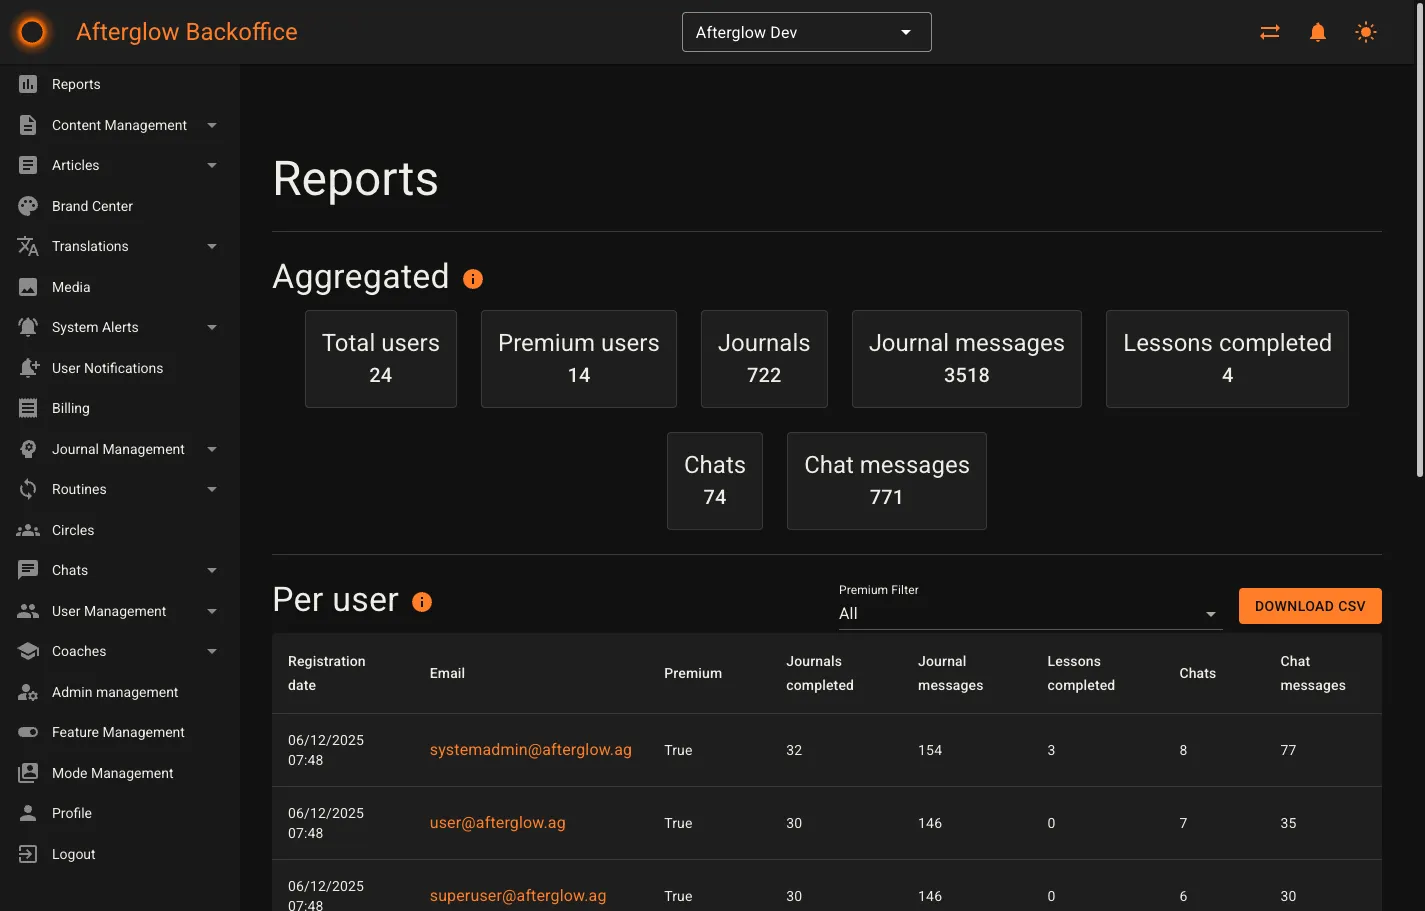
See Reports for a full breakdown of each metric.
Step 3 — Navigate the sidebar
Section titled “Step 3 — Navigate the sidebar”The sidebar on the left is your main navigation. It is organized into these sections:
| Section | What it does |
|---|---|
| Reports | Aggregated analytics and user activity |
| Content Management | Modules, lessons, lesson steps, answer templates, surveys, visualizations, and availability settings |
| Articles | Blog-style standalone content and topics |
| Brand Center | Logo, colors, and visual identity |
| Translations | Manage translated text and translation styling |
| Media | Shared media library for images, audio, and video |
| System Alerts | Alert rules, active alerts, and notification preferences |
| User Notifications | Push notification triggers sent to app users |
| Billing | Subscription and payment information |
| Journal Management | AI journal assistant configuration |
| Routines | Task templates and substance tracking |
| Circles | User groups for community features |
| Chats | One-to-one and circle chat conversations |
| User Management | View users, invite new ones, and manage access codes |
| Coaches | Coach directory and booking management |
| Admin Management | Add or remove admin accounts and assign roles |
Step 4 — Add your first content
Section titled “Step 4 — Add your first content”Content in Afterglow follows a three-level hierarchy: Modules contain Lessons, and Lessons contain Lesson Steps. To create your first piece of content:
- Expand Content Management in the sidebar and click Modules.
- Click New Module.
- Give the module a title, assign it to a category, and set its sort order.
- Save the module, then navigate to Lessons in the sidebar.
- Create a new lesson and link it to the module you just created.
- Navigate to Lesson Steps and add steps to your lesson.
- When you are happy with the content, click Publish Changes to push it live.
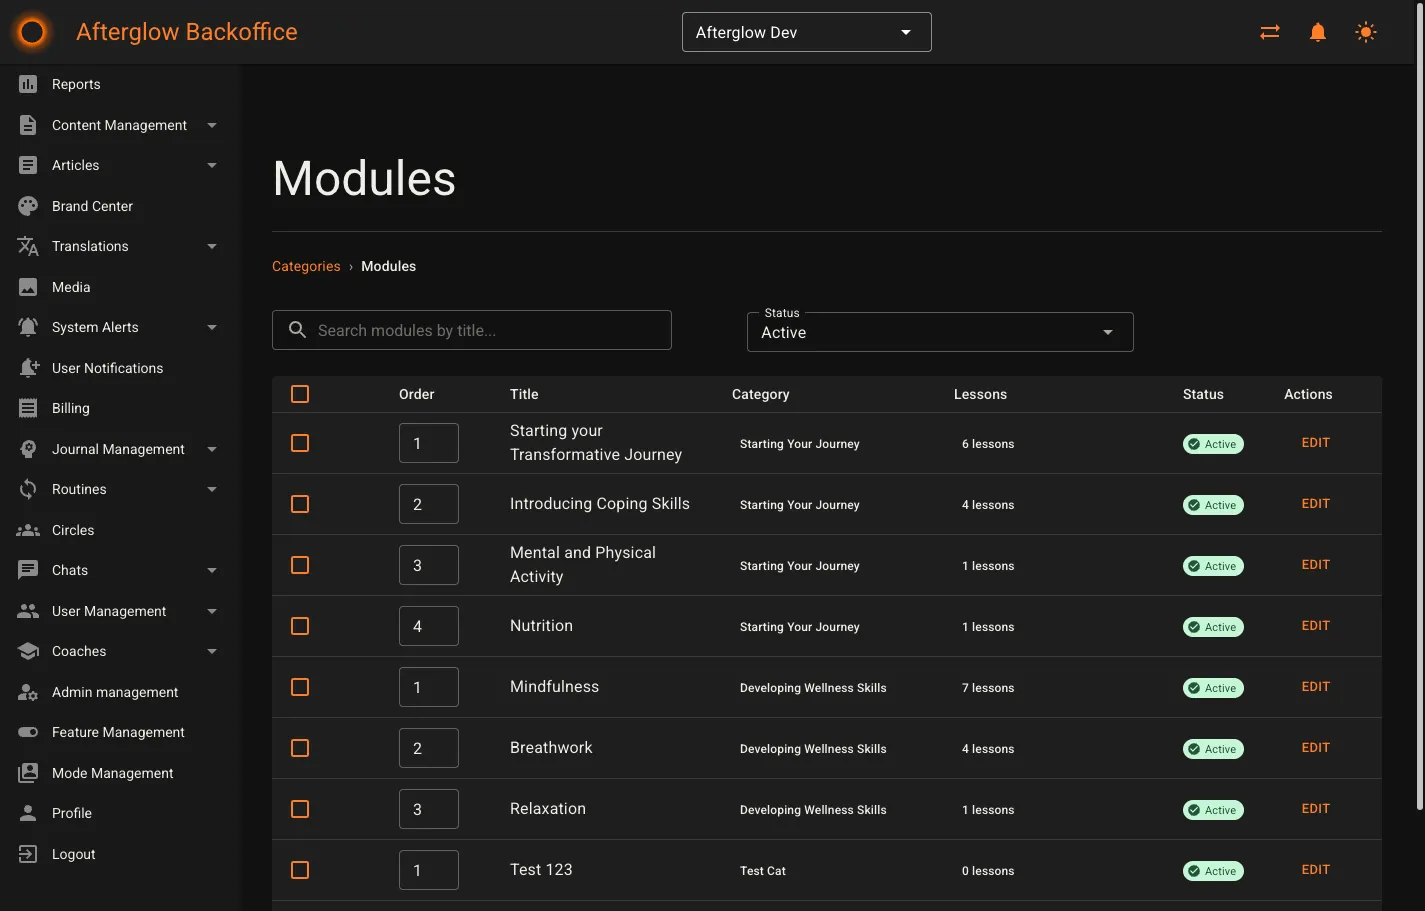
See Content Management and Content Structure for a detailed explanation of modules, lessons, and lesson steps.
Step 5 — Create an article
Section titled “Step 5 — Create an article”If the Articles feature is enabled, you can publish standalone content outside the module hierarchy.
- Expand Articles in the sidebar and click Articles.
- Click Add New.
- Fill in the title, subtitle, and content using the rich text editor.
- Optionally assign a topic, add tags, and set a cover image.
- Toggle Is Active to make the article visible to users.
- Click Save, then return to the overview and click Publish Articles to push your changes live.
See Articles for details on topics, tags, and the publishing workflow.
Step 6 — Invite users
Section titled “Step 6 — Invite users”The User Management page lets you view existing users and invite new ones.
- Click User Management in the sidebar, then click Users.
- To invite a single user, enter their email address in the Invite user section and click Invite.
- To invite multiple users at once, use the Bulk invite section and upload a list of email addresses.
- Invited users receive an email with instructions to create their account.
You can also generate access codes that allow users to self-register. If you want to automate access code creation from your own systems, see the Access Codes API.
See User Management for more on user profiles, access codes, and bulk operations.
Step 7 — Customize branding
Section titled “Step 7 — Customize branding”If the Brand Center feature is enabled and branding was not configured during workspace setup, you can personalize the platform now.
- Click Brand Center in the sidebar.
- Upload your organization’s logo and set your brand colors.
- Save your changes.
See Brand Center for all available branding options.
Next steps
Section titled “Next steps”You have completed the essentials. Here are a few areas to explore next:
- Journal Management — Configure AI-powered journal assistants for your users.
- User Notifications — Set up push notification triggers to keep users engaged.
- Coaches — If coaching is enabled, manage your coach directory and bookings.
- Admin Management — Add more admin accounts and assign roles.
- Roles and Permissions — Understand what each role can access.